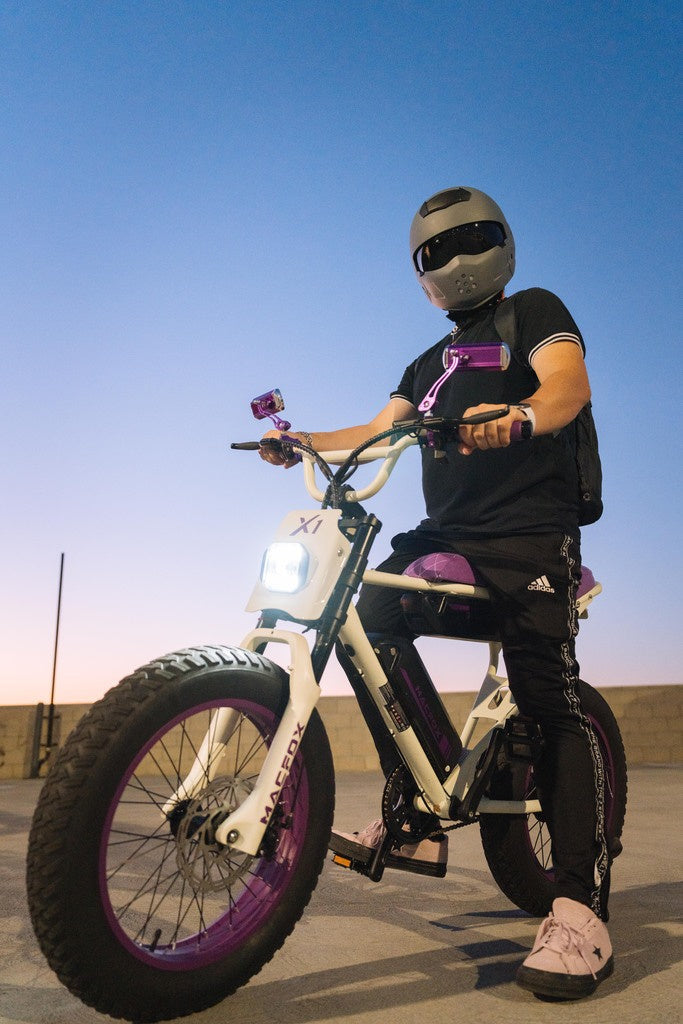
If your electric bike’s headlight suddenly isn’t working, don’t panic. In most cases, an e-bike headlight fault comes down to something simple and fixable.
Often it’s just a loose wire or low battery causing the dark headlight.
This article will guide you through the common causes of headlight problems, how to troubleshoot and fix them, and ways to prevent future issues.
With a bit of knowledge and patience, you can get your light shining again and ride safely at night.

Quick Summary of Electric Bike Headlight Issues
-
Common Causes: Most e-bike headlight outages trace back to basic issues like battery power problems, wiring issues, burnt-out bulbs/LEDs, blown fuses, switch failures, or water damage. These are usually easy to identify with a systematic check.
-
Troubleshooting: Start with simple checks – ensure the headlight is turned on via its switch, check the battery charge, and inspect connections. From there, examine the wiring for damage, test the bulb or LED, and look at fuses. We’ll provide step-by-step guidance to find the culprit and fix it.
-
Safety Note: Always address headlight problems promptly. Riding without a front light is unsafe and often illegal at night (many regions require a white front light visible from a distance). It’s crucial for your visibility and compliance with e-bike lighting laws.
-
Prevention: Regular maintenance can fend off headlight faults. Keep electrical connectors dry and secure, avoid pinching cables, and check your lights before each ride. A few preventive measures (covered below) will keep your headlights reliable and your night rides safe.
Common Causes of Electric Bike Headlight Faults
Understanding why an e-bike headlight fails is the first step to fixing it. Here are the most common causes of a headlight fault and how they lead to problems:
Battery or Power Issues
A weak or depleted battery is the number one cause of headlight problems. If your main battery is very low or not supplying enough voltage, the headlight may dim or not turn on at all.
In fact, many ebikes automatically cut power to the lights when the battery is critically low, which can cause the light to flicker or shut off. Always check your battery charge level first.
Also, ensure the light’s power connection is solid. Some e-bike headlights run off the main battery while others have a smaller dedicated battery pack.
If any battery connector is partially unplugged or corroded, it can mimic a dead battery by cutting off power. In short, verify your battery is charged and all power cables to the headlight are securely connected.
Related: Electric Bicycle Battery Failure – Diagnosing and Repairing Commuter E-Bike Batteries
Loose or Damaged Wiring and Connectors
Electrical wiring issues are another very common culprit behind headlight failures. Over time, vibrations from riding (especially on rough roads or trails) can loosen connections or even fray a wire.
A cable might get pinched (for example, in a folding e-bike’s hinge) or a plug might pull apart slightly, interrupting the circuit.
If your taillight or other electronics still work but the headlight doesn’t, that’s a strong hint that a specific headlight wire or connector has come loose or broken.
Carefully inspect the wiring from your headlight to the bike. Look for damaged insulation, bent or pushed-back connector pins, or wires rubbing against the frame.
Even a small break in a wire can stop power from reaching the light or cause the beam to flicker on and off.
In fact, wiggling the headlight’s wires gently can reveal a bad connection – if the light flickers when you move a wire, that wire or connector is likely at fault.
Fixing these issues might be as simple as pushing a connector back together or as involved as re-soldering a broken wire, but they are fixable.
Keeping an eye out for loose cables and securing them can prevent sudden light loss mid-ride.
Related: Common Wiring Problems and Troubleshooting Guide for Rear-Wheel Hub Motor E-Bikes
Burnt-Out Bulb or LED
Just like any household light, an e-bike’s headlamp can simply burn out after enough use or a strong jolt.
Older e-bikes that use halogen or filament bulbs can have the bulb blow out, especially after a big bump or when it has reached the end of its lifespan.
Modern e-bikes mostly use LEDs, which last much longer, but an LED headlight can still fail due to manufacturing defects, overheating, or water getting inside the unit.
When a bulb or LED module fails, the headlight will not illuminate at all. Often there are some warning signs: the light may become dimmer over time or start flickering before it goes completely dark.
If your headlight uses a replaceable bulb, you might visibly see a broken filament. With sealed LED units, the failure isn’t always visible externally.
In either case, once the light element is burnt out, the only fix is to replace that bulb or LED component. Fortunately, replacement e-bike bulbs or headlights are relatively inexpensive and easy to swap in.
Related: Understanding Bike Lumen Lights: How Bright is Bright Enough?
Faulty Switch or Controller
Sometimes the problem isn’t the light hardware at all – it’s the switch or control circuit that’s supposed to turn the light on.
Many e-bikes have a dedicated handlebar light switch or a button on the display for the headlight. If that switch is broken, stuck, or full of dirt, it may never actually send power to the headlight.
Essentially, the bike might “think” you haven’t turned the light on. A faulty switch can happen due to wear, moisture, or physical damage. Try toggling the light switch a few times and check that it isn’t jammed.
Additionally, some bikes manage the lights through the main controller or display software. If there’s a glitch in the system (for example, the display says the light is on but it’s actually off), there could be a controller fault.
One sign of this is if the headlight icon on your display is illuminated, yet the light itself stays dark – that suggests a fault in the controller’s lighting circuit or software.
In rare cases, e-bike firmware bugs can disable lights until a system reset is done.
If you suspect a control issue, you can try resetting the bike’s electronics (consult your manual) or cycling through any light modes your bike has. Otherwise, you may need a technician to inspect the controller or replace a broken switch.
Blown Fuse or Short Circuit
To protect the electrical system, many e-bikes have a fuse for the lighting circuit. If your headlight went out suddenly after a spark, a wiring short, or after installing a higher-wattage bulb, you may have blown a fuse.
When the fuse blows, power to the headlight (and often the tail light, if on the same circuit) is cut off completely.
A short circuit – say, from chafed wires touching the bike frame or water causing a temporary short – can also stop the headlight from working and usually is what causes the fuse to blow in the first place.
If you suspect a blown fuse, locate the fuse for your lights (check your e-bike’s manual for fuse location).
A blown fuse often has a broken metal filament visible inside it. Replace it with an identical-rated fuse.
Important: Before replacing a fuse, try to identify why it blew – for example, look for pinched or exposed wires that might be causing a short.
If you replace a fuse without fixing the underlying short, the new fuse will likely blow again immediately.
Also note that on some bikes, the horn or other accessories might share the same fuse as the headlight. So if both your headlight and horn died together, a fuse is a prime suspect.
Fix any wiring issues, then restore the fuse and your light should come back to life.
Related: Common Fuse Types for Electric Bicycles: A Comprehensive Guide
Water Damage and Corrosion
E-bikes often face the elements, and water is a common enemy of electronics.
If moisture gets into the headlight housing or the connectors, it can cause corrosion or even an electrical short that disables the light.
Heavy rain, riding through deep puddles, or washing your bike without protecting the electrical parts can all lead to a headlight failure due to water ingress.
For instance, water seeping into an LED headlamp can short out its driver circuitry, and standing water in a connector can corrode the pins and wires.
Corrosion from water or road salt will increase electrical resistance and can make the light behave erratically (flickering on/off) before it fails entirely.
If your headlight stopped working right after a soaking rain ride or after the bike was left in a damp area, suspect water damage.
The good news is that minor moisture issues can often be fixed by drying things out: disconnect the light and battery, gently dry the connectors and let the headlight assembly air out.
Cleaning off any white or green corrosion on connector pins can also restore contact. Once it’s dry and clean, the headlight might start working again if no permanent damage was done.
Going forward, make sure the headlight’s seals or gaskets are intact to keep water out, and consider using a bit of dielectric grease on the connector pins to repel moisture.
Avoid spraying water directly at the display, controller, or light when cleaning the bike, and store the bike indoors or under cover when possible to prevent corrosion.
Other Rare Issues
In a few cases, a deeper electrical fault like a bad controller output can cause a headlight to fail, but this is uncommon.
If all else checks out – battery, wiring, bulb, switch, fuse – yet the headlight still won’t work, the bike’s controller itself might have a defect on the lighting circuit.
Incompatibility (like installing a 6V aftermarket light on a 48V system) can also instantly burn out a headlight.
Such issues are infrequent, but keep them in mind if you’ve exhausted all common causes.
How to Troubleshoot and Fix a Headlight Fault

Once you understand the possible causes, it’s time to troubleshoot your electric bike’s headlight step by step. Here’s a logical approach to pinpoint the problem and fix it:
Check the Basics
Make sure the headlight is actually turned on! Many e-bikes require holding a button or a specific key sequence to activate the lights.
It sounds obvious, but ensure you didn’t accidentally turn the light off or put it in the wrong mode.
Next, see if other bike lights are working – for example, does your tail light or display backlight come on?
If both front and rear lights are out, you might have a bigger power issue (battery or controller) rather than the headlight itself. If the tail light is on but the headlight isn’t, that suggests the issue is isolated to the headlight circuit.
Verify Battery Power

Check your battery level and connection. Is the bike’s main battery charged sufficiently? A nearly empty battery may cut off power to the headlight.
Make sure the battery is seated properly and any battery quick-disconnect cables are tight. If your headlight uses a separate battery pack, ensure that it’s charged as well.
In some cases, you can test the light by connecting it to an external power source (if you have a spare battery or DC power supply).
This can rule out the bike’s battery as the culprit. Essentially, confirm that your light is getting the volts it needs.
Inspect Cables and Connectors
Carefully examine the wiring that leads to the headlight. Look for any obvious damage: frayed or cut wires, crimped sections, or disconnected plugs.
Pay extra attention to sections of cable that flex when the handlebars turn or that pass through the frame, as these are common places for wires to get pinched or broken.
Perform a “wiggle test” on the connectors and wiring: with the bike and light turned on (or while watching the headlight if it’s intermittent), gently wiggle the wire and connectors going to the light.
If the headlight suddenly flickers on or off, you’ve found a loose or damaged wire/connector. Also unplug the headlight’s connector (if it has one) and inspect the pins for dirt or corrosion – dirty contacts can prevent power flow.
Clean any corroded terminals with electrical contact cleaner or a bit of alcohol and reconnect them firmly.
Test the Bulb or LED Unit
If wiring looks fine, the light source itself may be the issue. For headlights with replaceable bulbs, remove the bulb and inspect it.
If the filament inside is broken or the bulb looks burnt, that bulb is blown and needs replacement. Swap in a new bulb of the same type and see if that fixes it.
For LED headlights or sealed units, you might not have an easily removable bulb. In that case, if you have access to a similar headlight (or a friend’s e-bike), you can do a cross-test: plug your headlight into the other bike, or plug a known-good headlight into your bike’s connector.
If your headlight fails on the other bike too, then the headlight unit is bad. If a different headlight works on your bike, that also confirms your original light is faulty.
This kind of swap test can quickly isolate a bad headlight unit. In some instances, an LED light might have an internal fault – unfortunately, the fix is usually to replace the entire light if that’s the case.
Check the Switch and Settings
Ensure the handlebar light switch (or the ON/OFF button for lights on your display) is functioning. Feel if the button clicks properly or if it’s stuck.
Sometimes dirt or water can make a switch unresponsive. Some e-bikes also have multiple light modes (high beam, low beam, flash). Try switching between modes if applicable.
It could be that one mode works and another doesn’t, which hints at an internal switch or wiring issue. If you suspect the switch is bad, you might need to have it repaired or replaced.
Also consider resetting the bike’s electronics by power cycling or using a reset procedure, as a software glitch could be keeping the light off even when everything is physically okay.
Inspect Fuses and Look for Shorts
If you still have no luck, it’s time to check for a blown fuse or other electrical faults.
Locate the fuse that protects the lighting circuit – this could be in the bike’s controller box or battery compartment. Remove the fuse (with the bike power off) and see if it has blown (the tiny metal strip inside will be broken or blackened).
Replace it with the same amperage rating fuse and test the light again. But if the fuse was blown, remember there was likely a reason.
Look over the wiring harness for any signs of a short circuit: wires with melted insulation, exposed copper touching the frame, or recently added accessories that tie into the lighting.
A common cause is a wire that rubbed against the frame until it wore through the insulation and shorted out. If you find such damage, repair the wire with proper insulation or replace it before inserting a new fuse.
After fixing any shorts, the new fuse should hold and your headlight should work. If it blows again immediately, there’s still a short or overload somewhere. At that point, professional help may be needed to trace it.
Consider Professional Help if Needed
By now, if you’ve checked power, wiring, bulb, switch, and fuses, and the headlight still refuses to light, the issue might lie in the controller or another complex component.
For instance, the transistor that drives the headlight in the controller could have failed. Such issues aren’t common, but they can happen especially if the bike had an electrical surge or was modified.
In this situation, or if any step above felt beyond your comfort level, it’s wise to consult a qualified e-bike technician. They have the tools (like multimeters and diagnostic devices) to pinpoint deeper electrical problems.
The good news is that most headlight faults won’t come to this – usually, you’ll have found a loose connector, a bad bulb, or another simple issue by this point. But if not, a professional can safely get your lighting back in order.
By following these steps in order, you’ll methodically eliminate potential problems and zero in on the actual cause. Most importantly, you’ll get that headlight back to working condition so you can ride with confidence at night.
Tips to Prevent Future Headlight Problems
Once you’ve fixed your e-bike’s headlight (or installed a new one), you’ll want to avoid running into the same issue again.
A bit of regular care can go a long way toward keeping your lights reliable. Here are some expert tips to prevent headlight faults:
Regularly Check Connections
Every couple of weeks, especially if you ride on bumpy terrain, give your light cables and plugs a quick inspection. Ensure connectors are fully plugged in and not wiggling loose.
Tighten any cable that looks like it’s coming undone. Catching a connector that’s starting to work loose can prevent a sudden loss of light mid-ride.
Keep the Components Dry
While quality bike lights are built to handle rain, it’s best not to push your luck. After riding in wet conditions, dry off the headlight and wipe any water away from connectors.
Avoid spraying water directly at the headlight, display, or controller when washing the bike. Water and electronics don’t mix – keeping things dry will stave off corrosion and short circuits.
If you live in a very rainy area, consider additional waterproofing (like sealing connector joints with heat-shrink tubing) and store the bike indoors to dry after wet rides.
Avoid Cable Strain and Pinching
Route your headlight’s wiring so that it isn’t pulled tight or sharply bent at any point. Leave a bit of slack where the wire goes from the frame to the handlebar, so turning the handlebars doesn’t stretch it.
Use gentle zip-ties or clips to secure loose wires, but not so tight that they cut into the cable.
If you fold your e-bike, always double-check that the headlight cable isn’t getting pinched in the folding mechanism. Preventing abrasion and strain on the wires will help avoid internal breaks.
Use Corrosion Protection
If you frequently ride in rain or near the ocean (salt air can corrode metal fast), protect your electrical contacts.
A thin dab of dielectric grease inside the headlight’s connectors can repel moisture and prevent rust on the pins. This keeps the connection solid over time.
Also, if your headlight has any exposed metal contacts (like where a removable battery or connector plugs in), keep them clean and consider applying a corrosion inhibitor spray.
Don’t Overload the Lighting Circuit
Stick to the manufacturer’s specifications when replacing or upgrading your headlight. If you want a much brighter light than stock, it might be safer to use an independent battery-powered light rather than drawing significantly more power through the e-bike’s wiring.
Using a higher-watt bulb than the circuit is designed for can blow fuses or even damage the controller. So, use compatible lights and don’t daisy-chain too many accessories on one circuit.
Carry a Backup Light
As a precaution, some riders carry a small backup light or headlamp when biking at night.
This won’t prevent a failure, but it will prevent a failed headlight from leaving you stranded in the dark. A compact LED flashlight or a helmet-mounted light can save the day if your main headlight goes out unexpectedly.
It’s part of being a prepared cyclist and ensures you’re never completely without light.
Do a Pre-ride Light Check
Get in the habit of quickly checking your lights before each night ride. Turn on your bike’s headlight and tail light and make sure they illuminate properly.
This simple 10-second check can catch an issue before you’re moving. It’s much better to find out in your driveway that your headlight isn’t working than to discover it on a dark road.
If you find a problem, you can address it or grab that backup light before heading out.
By following these preventive tips – keeping things dry, tight, and protected – you’ll greatly reduce the chances of encountering another headlight failure. Good maintenance practices will keep your e-bike’s lighting system shining bright for a long time.
Conclusion
In all these scenarios, the key is observing the symptoms and linking them to likely causes.
By understanding what happened and how the bike behaved (sudden vs gradual failure, one accessory vs multiple, wet conditions, etc.), you can narrow down the culprit.
The solutions often circle back to the basics we covered: tighten something loose, dry something wet, replace something blown, or, on rare occasions, fix/replace a bad component.
By promptly fixing any headlight fault and taking steps to prevent future problems, you ensure that you’ll always be visible and confident during your night rides. Safe riding!


